Reinstalling the encoder strip into the service station bracket on the right
end of a DesignJet 500 DesignJet 510 and
DesignJet 800 plotter can be a bit tricky.
But
with the Service Manual and a few photos it is actually an easy task to accomplish.
Parts
involved:
Service Station Bracket C7769-60156 aka C7769-60391
Encoder
Strip for 24 inch plotter models C7769-60183
Encoder Strip for 42 inch
plotter models C7770-60013
So here are a few figures and instructions to help you on your way.
Follow up:
| The first photo shows the the Service Station
bracket as seen from the outside (right end) of the plotter.
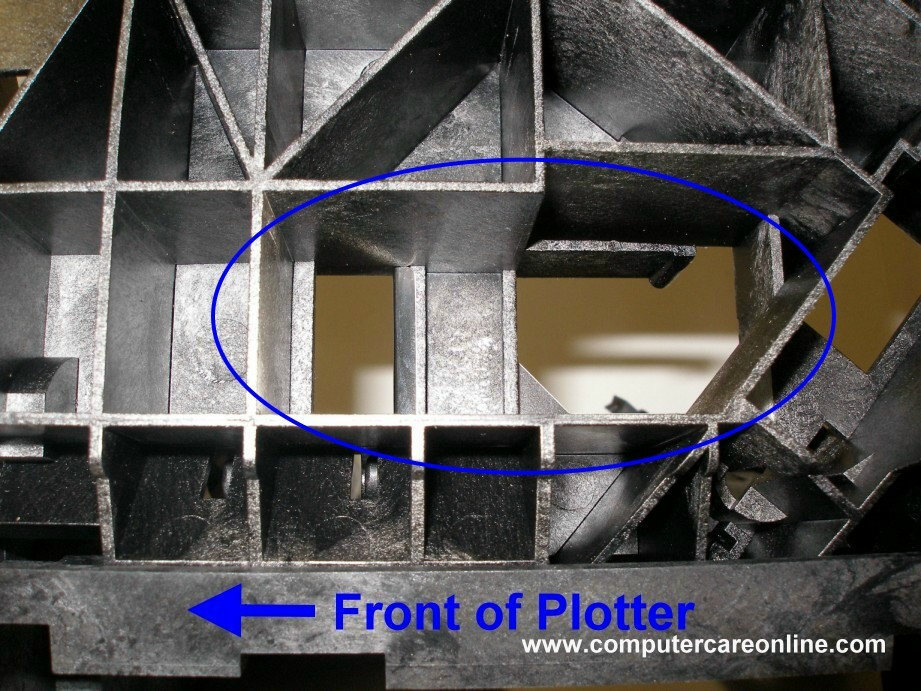
Note
the orientation to the front of the plotter.
Circle indicates
where the Encoder Strip will enter the Bracket and where the
Encoder strip bracket will attach.
|
| The Second photo shows the inside of the Service
Station Bracket.
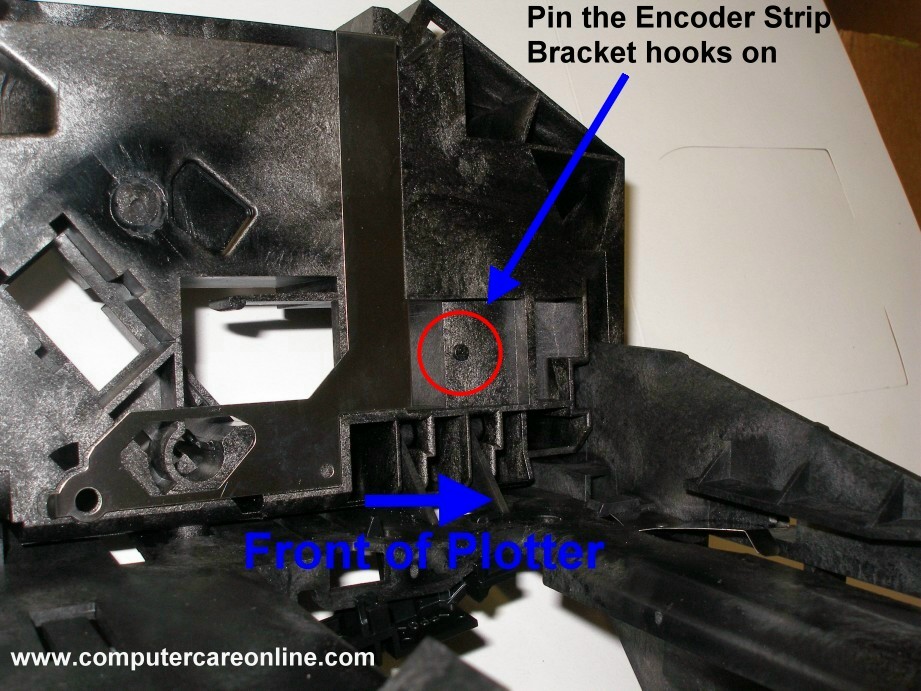
The
red circle indicates the pin or nub that encoder strip bracket
will rest or hook on.
|
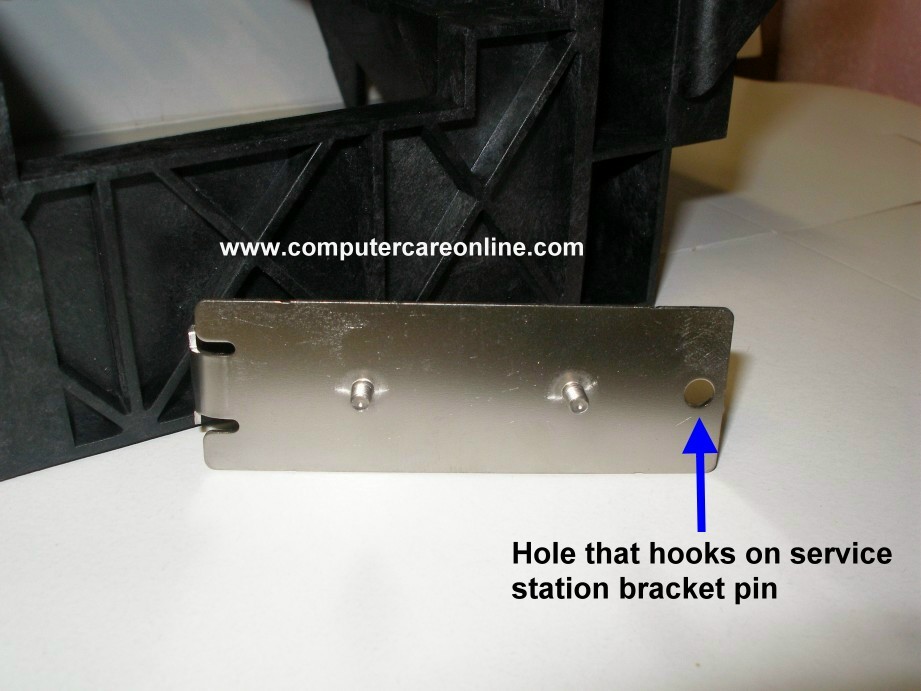
| The Third photo shows the Metal Encoder Strip
bracket and indicates the hole that must rest on the above
mentioned pin.
|
| The Fourth photo shows the Encoder Strip Bracket
installed in the Service Station Bracket.
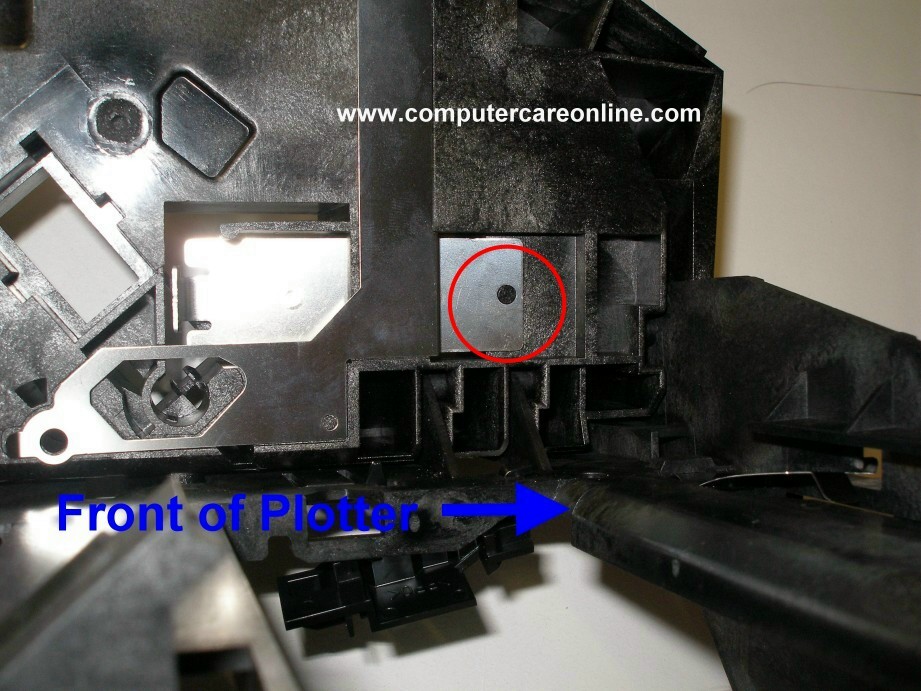
The
red circle indicates the pin or nub as it sticks through the
hole in the metal Encoder Strip bracket
|
| The Fifth photo shows the Metal Encoder Strip
bracket installed in the Service Station Bracket from the
outside.
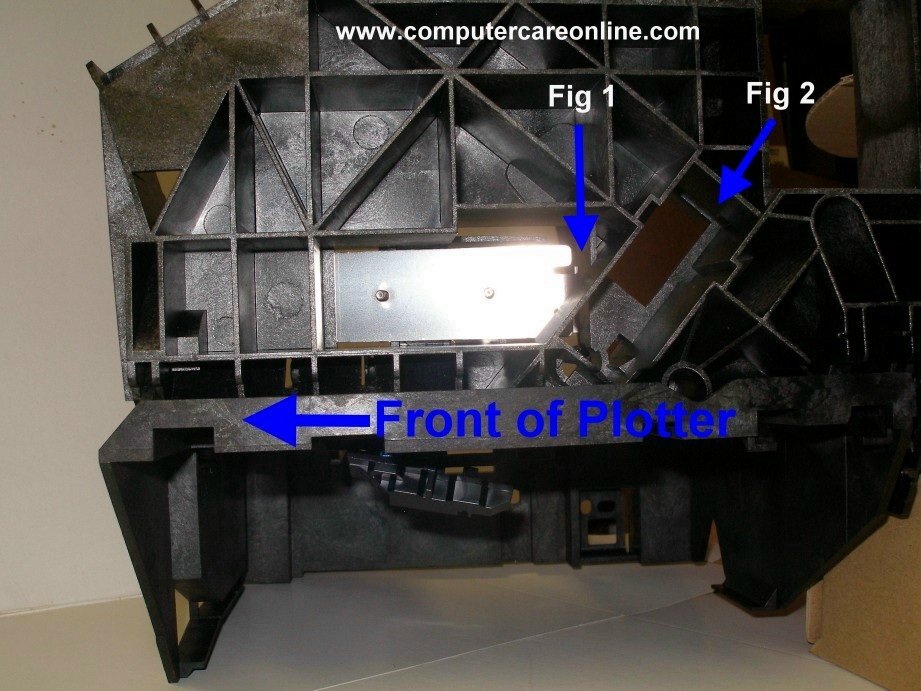
Note how the Encoder Strip bracket fits into the Service
Station Bracket.
Fig 1: Indicates where the Encoder Strip
will pass out of the plotter and around the bracket.
Fig 2:
Indicates where the Carriage Belt Tensioner assembly is normally
installed.
|
The Encoder Strip bracket must be properly hooked on
the pin or nub on the Service Station
bracket, the tension from the Encoder Strip will pull against the bracket and keep it locked in place.
The Encoder Strip will pass around the metal bracket from the rear side of the plotter and the two holes in the end of the Encoder Strip will be hooked over the two metal pins on the bracket. The rear most of the two pins is a bolt and has a nut and locking washer that screw down to hold the Encoder Strip in place.
Note: There is a great deal of tension on the Encoder Strip so it will not be easy to get it over the two pins and locked into place.
|
|
Like Computer Care on FaceBook
Follow us on Twitter
computer Care on Pinterest
computer Care on instagram
Visit the Computer Care Catalog Online for all your part needs.